
A bus pass and an electric scooter both get you to work, but they ask for different things from your morning. A bus asks for patience with timetables and crowds, while a scooter asks for a helmet, a charged battery, a safe route, and a few minutes of practice before you join traffic. For short urban trips, the scooter often wins on time and flexibility, because you leave when you want, park near the door, and avoid waiting for a delayed service. It only wins safely when you set up electric scooter for commuting beginners the right way, because a scooter with soft tyres, weak brakes, or a dead battery in traffic is not a shortcut at all.
If you want to set up electric scooter for commuting beginners in a way that survives real traffic, start with local rules, a practice field, and a safety routine, and only then worry about range, speed, or accessories. This guide follows that order, with a first-ride safety checklist, a commute-gear and charging table, route planning, battery care, and the daily habits that turn a new scooter into a reliable commute.
Compare Scooter Commuting With Walking, Cycling, and the Bus
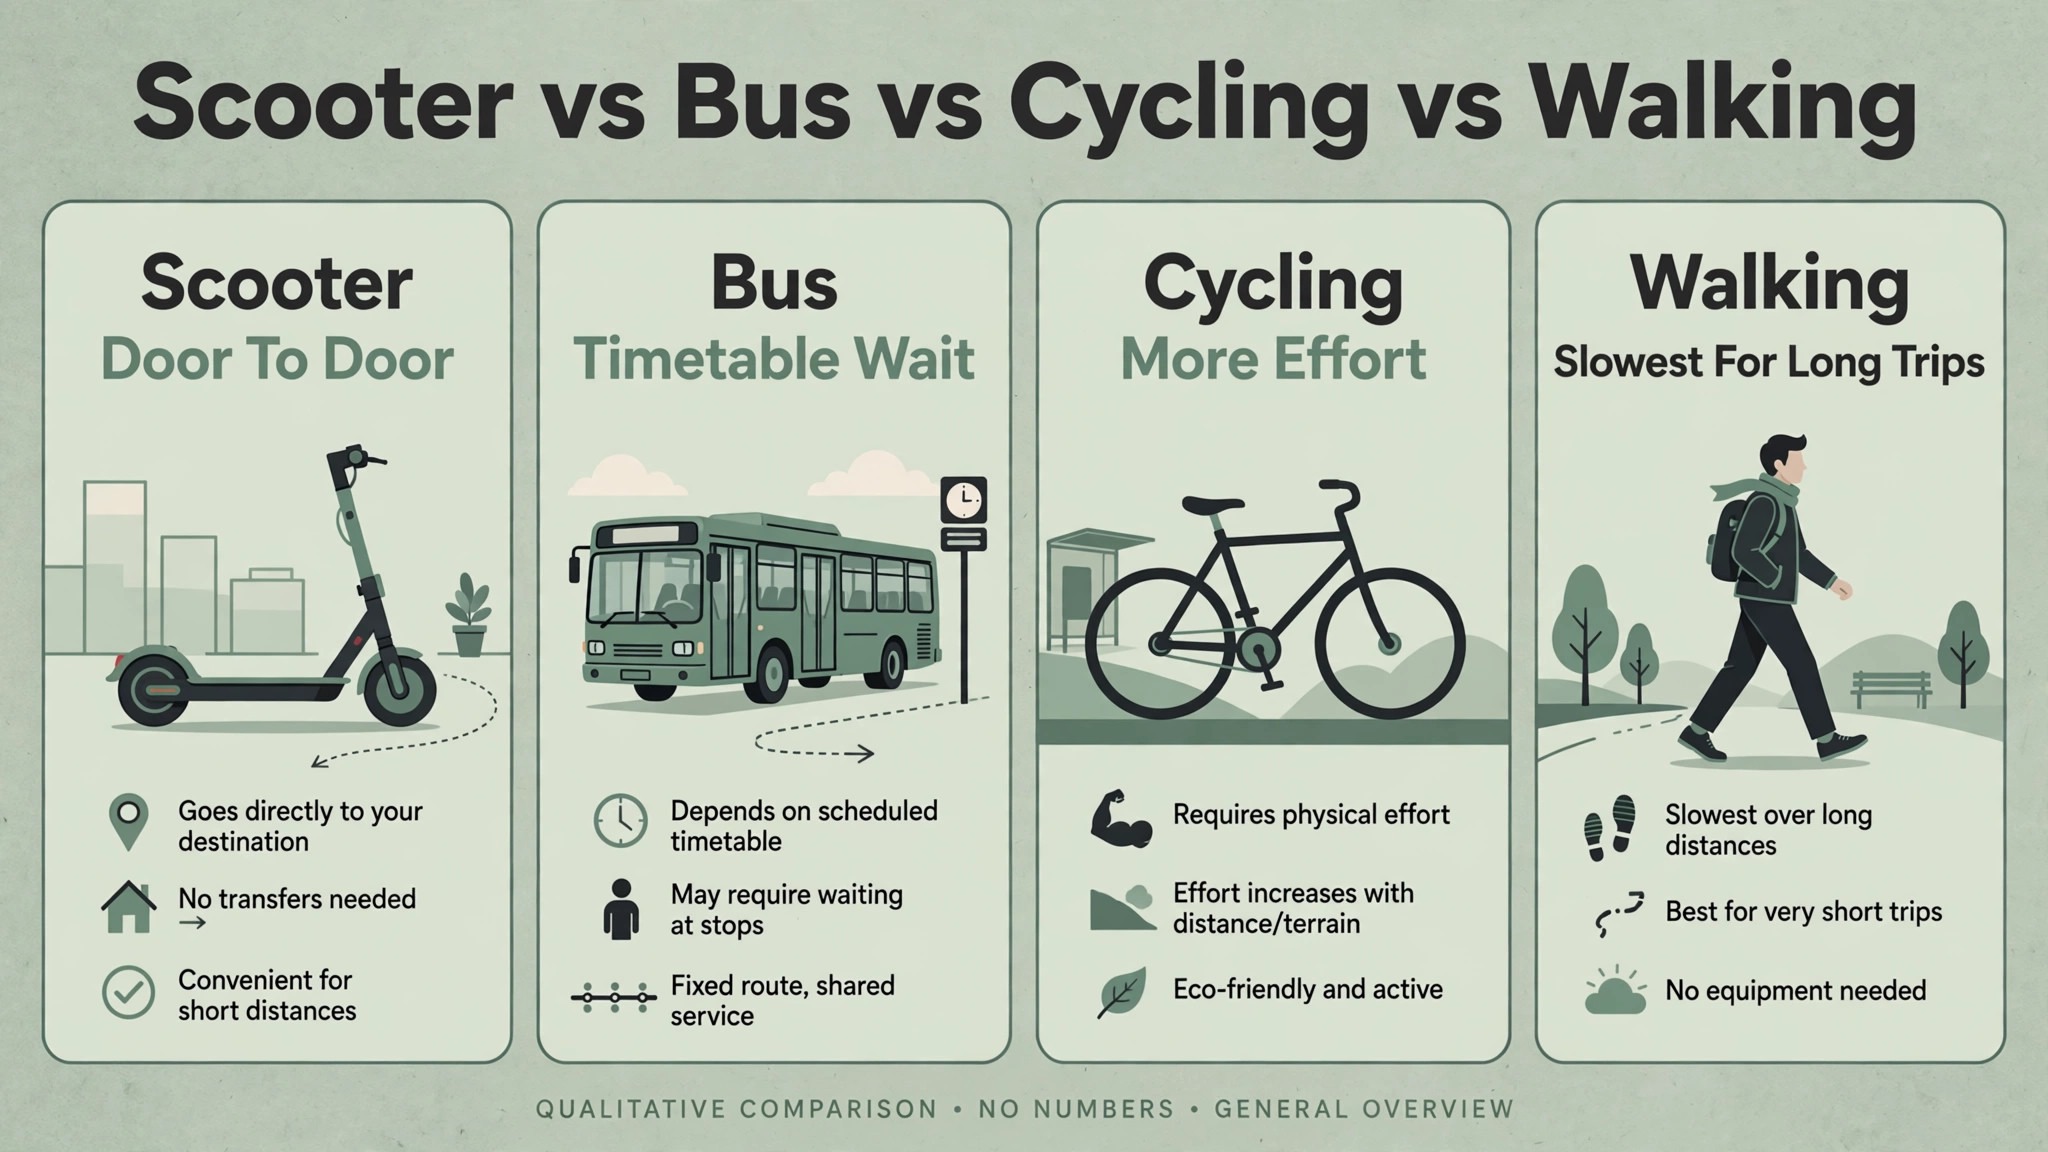
Scooter commuting suits trips that are too long to walk comfortably but too short to justify a car or a long bus wait, typically a few kilometres through a city with bike lanes or quiet streets. Compared with walking, a scooter saves time and arrives with less sweat, but it needs charging, storage, and a helmet, and it cannot use every pavement that a walker can. Compared with cycling, a scooter needs less physical effort and less changing at work, but it offers less exercise, less cargo capacity, and a smaller wheel that feels bumps more sharply.
Compared with the bus, a scooter gives door to door flexibility and no timetable, but it exposes you to weather, traffic, and the need to secure the scooter at work. The honest test is your actual route, not a general claim. Ride or walk the route once, note hills, rough surfaces, busy junctions, and places to lock or store a scooter, and decide whether a scooter improves that specific trip. If your route has long steep hills, heavy traffic with no bike lane, or a workplace with nowhere safe to store a scooter, a scooter may be a poor fit despite its appeal, and a bus plus walking combination may serve you better.
Xiaomi Electric Scooter Models and Beginner Commutes
Xiaomi electric scooters are common beginner commuter choices because they offer a balance of price, range, and weight that suits short city trips, with models that fold for storage and carry in offices or flats. Check the exact model range, weight, tyre type, and top speed before you buy, because models in the same family can differ enough to change whether a commute feels easy or strained. A lighter scooter is easier to carry up stairs and into an office, while a heavier scooter often gives a longer range and a more stable ride, so weigh portability against range for your building and workplace.
Check whether your model has pneumatic tyres or solid tyres, because pneumatic tyres give a softer ride and better grip on rough roads but need pressure checks and can puncture, while solid tyres need less maintenance but feel harsher. Test fold and unfold in a shop if you can, because a folding mechanism that feels stiff in a shop will feel worse with a bag and a coffee in your hands at work. Buy from a retailer that can service the model, because a scooter without local parts and service becomes hard to maintain after a puncture or a brake issue.
Segway Ninebot Scooters and App Setup
Segway Ninebot scooters are also popular with commuters, and their app setup is part of the first ride routine rather than an afterthought. Install the maker app, pair the scooter over Bluetooth, check for a firmware update, and set a beginner or eco mode for your first rides, because a lower top speed and gentler acceleration make early traffic much easier to handle. Use the app to check battery level, lock the scooter when parked, and review ride settings, but do not stare at the app while riding, because a glance at a phone on a scooter is a common cause of a drift into a kerb or a pedestrian.
Set a PIN or lock in the app where your model offers it, and learn how the electronic lock interacts with a physical lock, because an app lock alone does not stop someone carrying the scooter away. Keep the app updated, but do not update firmware the morning of an important commute, because an update that needs a restart or a recalibration can delay your departure. A calm app setup at home, done the night before your first commute, prevents a rushed setup in a car park.
Check Local Rules, Age Limits, and Where You May Ride
Scooter rules vary widely by city, state, and country, and a rule that is correct in one place can be illegal in another. Check whether electric scooters are legal on roads, bike lanes, pavements, or only on private land in your area, and check age limits, helmet requirements, speed limits, and whether a licence or registration applies. Some cities allow scooters only in bike lanes and on quiet roads, some ban them from pavements entirely, and some require a helmet for all riders while others require it only for younger riders.
Check workplace and building rules too, because a scooter that is legal on the road may still be banned from an office lift, a train, or a flat hallway where charging is concerned. Check local rules for parking as well, because leaving a scooter across a pavement can block pedestrians and attract a fine or removal. When rules are unclear, contact your local transport authority or check its official guidance rather than relying on a shop assistant or a social media post, because shops and posts often generalise from a different city. Riding legally is not just about avoiding a fine. It also affects insurance, liability after a collision, and whether a workplace will let you store the scooter indoors.
First-Ride Safety Checklist
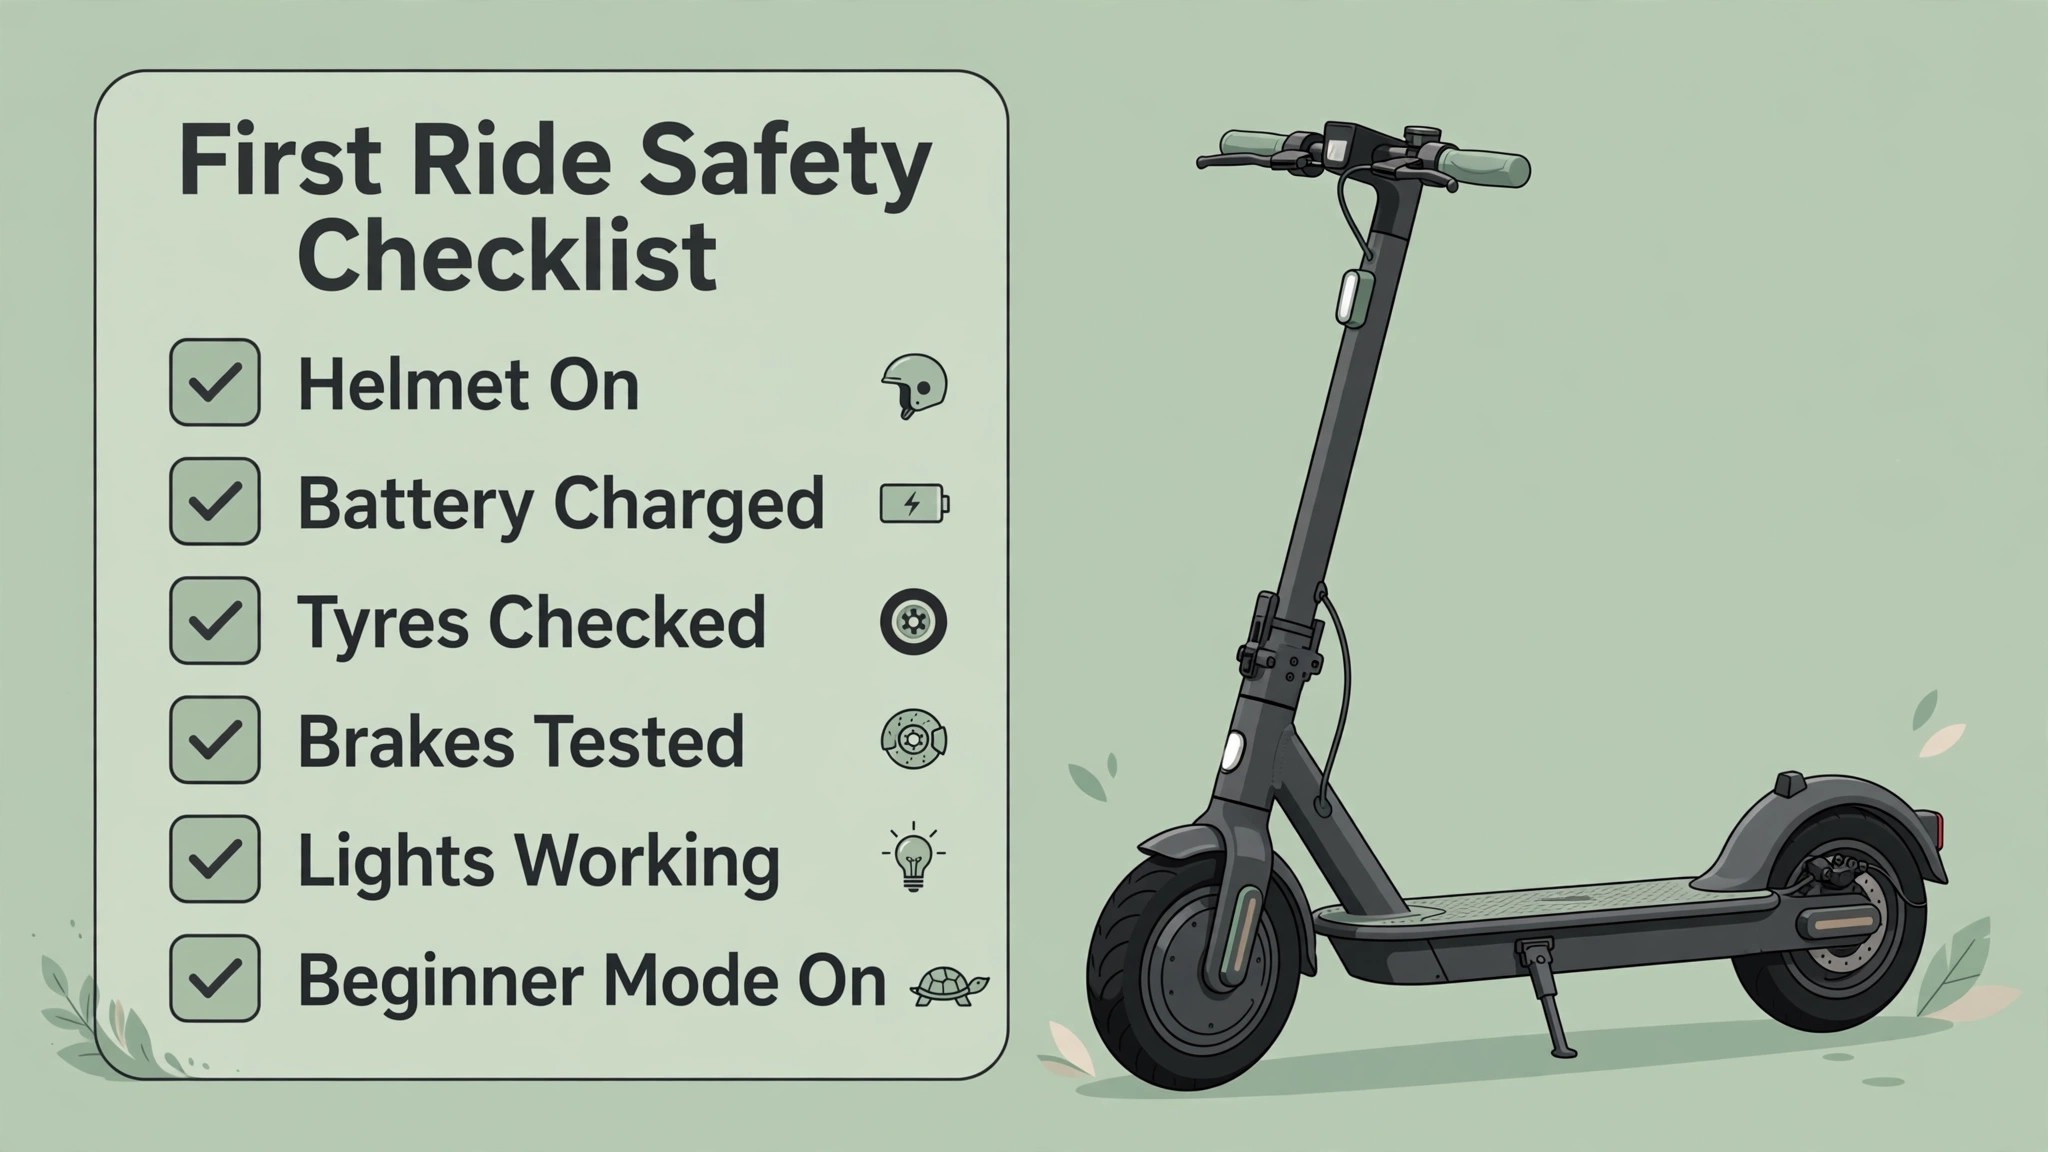
Use this checklist before your first ride and before every commute in the first month, until the steps become automatic. A fixed checklist is central to how you set up electric scooter for commuting beginners safely. Work through it in the same order each time, and do not skip the brake test just because the scooter felt fine yesterday.
- Wear a helmet that fits snugly, fasten the strap, and add gloves, closed shoes, and reflective clothing for low light rides.
- Charge the battery fully, confirm the charge level on the display or app, and plan a route that leaves a comfortable battery reserve.
- Check tyre pressure for pneumatic tyres, inspect tyres for cuts and wear, and check that wheels spin freely without wobble.
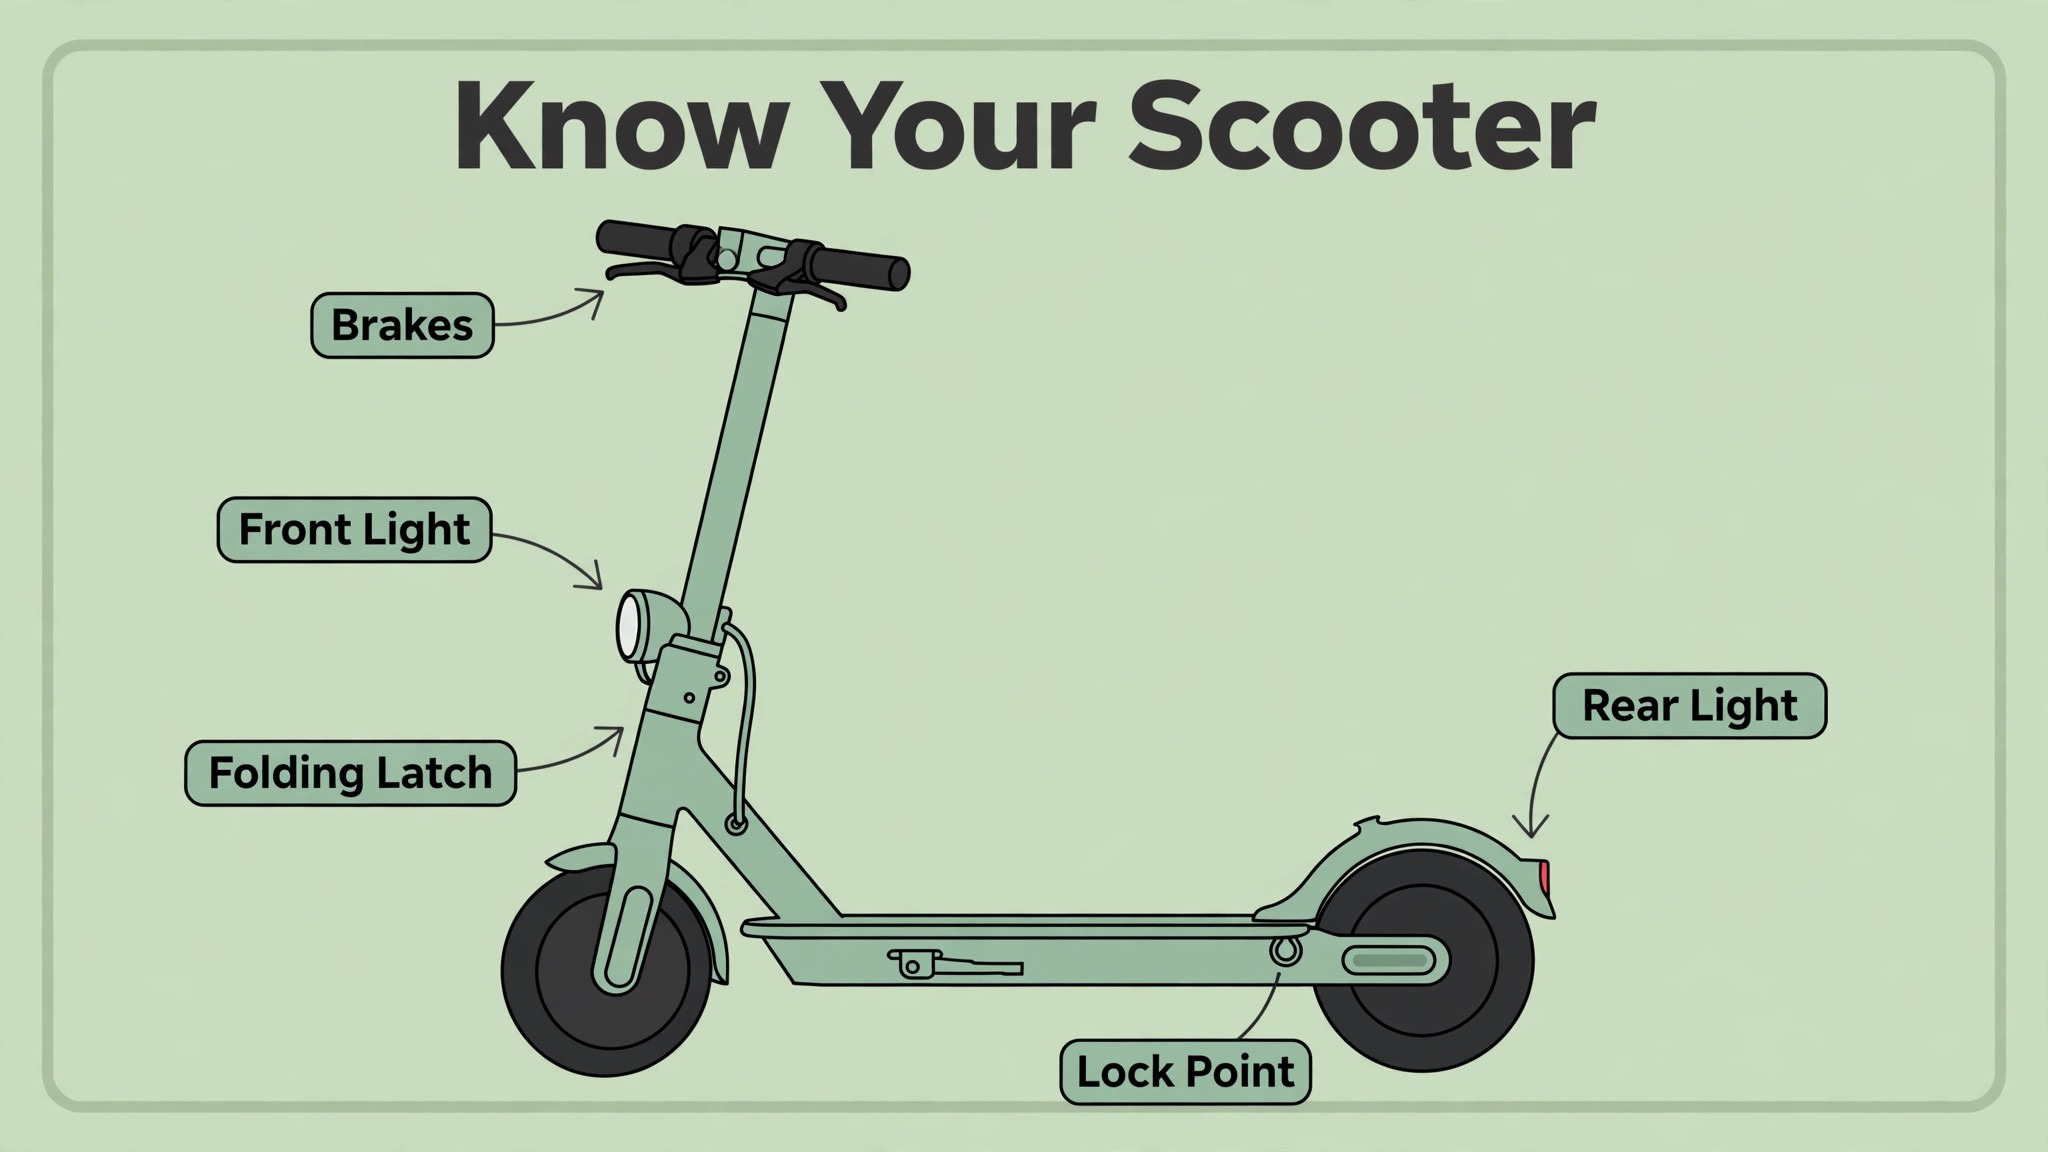
- Test both brakes at walking speed in a safe area, checking that braking feels even and the scooter stops in a straight line.
- Check lights, indicators where fitted, bell or horn, and display, confirming each works before you enter traffic.
- Unfold and lock the scooter fully, check the folding latch, handlebar, and stem for looseness, and tug the handlebar firmly.
- Set beginner or eco mode for early rides, limiting top speed and softening acceleration until control feels natural.
- Choose a quiet practice area for the first ride, away from traffic, pedestrians, and obstacles, with a flat surface and room to stop.
- Practise kick off, gentle throttle, smooth braking, and slow turns in that area before you attempt a real road or bike lane.
- Plan your route in advance, favouring bike lanes and quiet streets, and note safe places to stop, lock the scooter, and charge if needed.
- Carry a phone, a small lock, and a basic repair kit for pneumatic tyres, and tell someone your route and expected arrival for early commutes.
Learn Stance, Throttle, Braking, and Turning in a Car Park
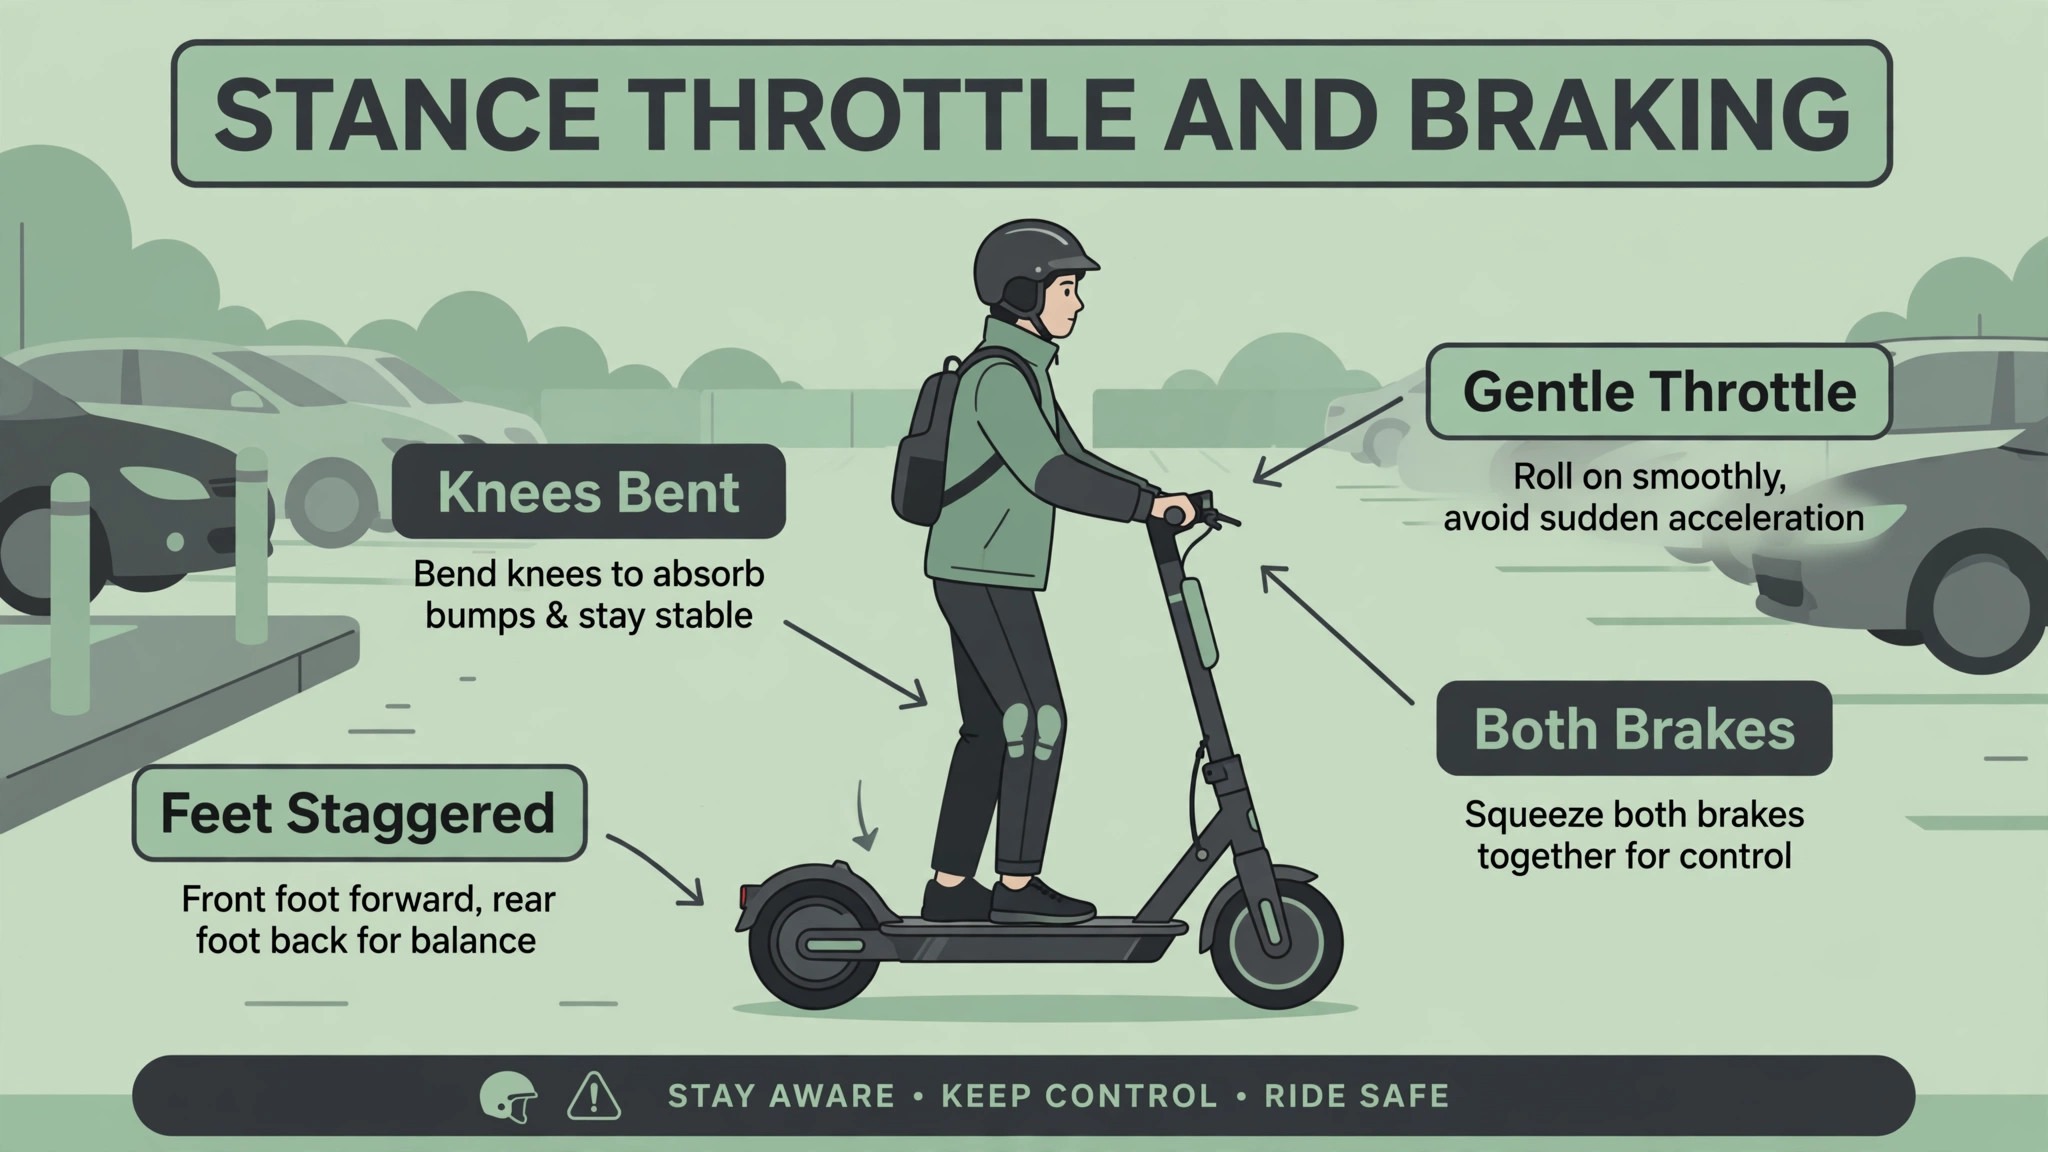
Stance is the foundation of scooter control, and it feels unnatural for the first few minutes. Stand with feet staggered, one foot forward and one slightly back, knees slightly bent, and weight centred over the deck, rather than standing with feet together and legs locked. Bent knees absorb bumps and let you react quickly, while locked knees transmit every bump to your body and make a sudden stop feel unstable. Practise kick off by pushing with one foot to gain slow momentum, then placing that foot on the deck and applying throttle gently, because a standing start with full throttle can jerk the scooter and throw your weight backwards.
Practise throttle control by rolling on slowly and releasing smoothly, rather than squeezing and releasing in sharp bursts, because smooth throttle keeps the scooter stable and predictable. Practise braking with both brakes where your model has them, applying gently and earlier than feels necessary, because braking only with the front brake at speed can pitch you forward, while braking only with the rear can skid. Practise slow turns by leaning slightly and looking where you want to go, rather than turning the handlebar sharply, because a sharp handlebar turn at speed is a common beginner fall.
Spend at least thirty minutes on these drills in a car park before your first commute, and repeat them after any long break from riding. Practice time like this helps anyone who wants to set up electric scooter for commuting beginners with confidence.
Xiaomi Scooter Braking and Beginner Mode Practice
Braking practice deserves its own session, because braking is the skill that prevents most beginner collisions. Find an empty car park, ride at a slow speed, and practise stopping smoothly at a marked point, repeating the drill at gradually higher speeds within beginner mode. Notice how stopping distance grows with speed, how wet ground lengthens it further, and how a downhill slope changes it again, because those three factors together decide whether you can stop before a junction. Practise an emergency stop from a moderate speed in a safe area, so the feeling of firm braking is familiar before you need it in traffic.
If your scooter has regenerative braking plus a mechanical brake, learn how each feels, because regenerative braking alone can feel weaker at low speed or when the battery is full. Check brake pads and cables regularly, and replace worn pads before they become a safety issue, because a brake that feels soft on a quiet street will feel dangerous in traffic.
Plan a Commute Route That Favours Safety Over Speed
A good commute route is rarely the shortest route on a map, because the shortest route often uses the busiest roads. Choose bike lanes, quiet residential streets, and shared paths where scooters are allowed, even if that adds a few minutes, because a calmer route reduces stress and collision risk far more than a faster route saves time. Ride the route once on a weekend or in light traffic before your first workday commute, noting potholes, drain covers, raised kerbs, and junctions where drivers may not expect a scooter. Note places to stop safely, such as a wide pavement section or a car park entrance, where you can pull over without blocking pedestrians.
Note secure parking at work, including whether you can bring the scooter inside, lock it to a rack, or fold it under a desk, and test that parking plan before a day when you are in a hurry. Plan for weather by checking the forecast and carrying a light waterproof layer, because rain changes braking distance and visibility, and a wet commute without a plan often ends with a rushed, risky ride. If a section of route feels unsafe after a test ride, change the route rather than hoping traffic will be lighter on a workday, because workday traffic is usually heavier, not lighter.

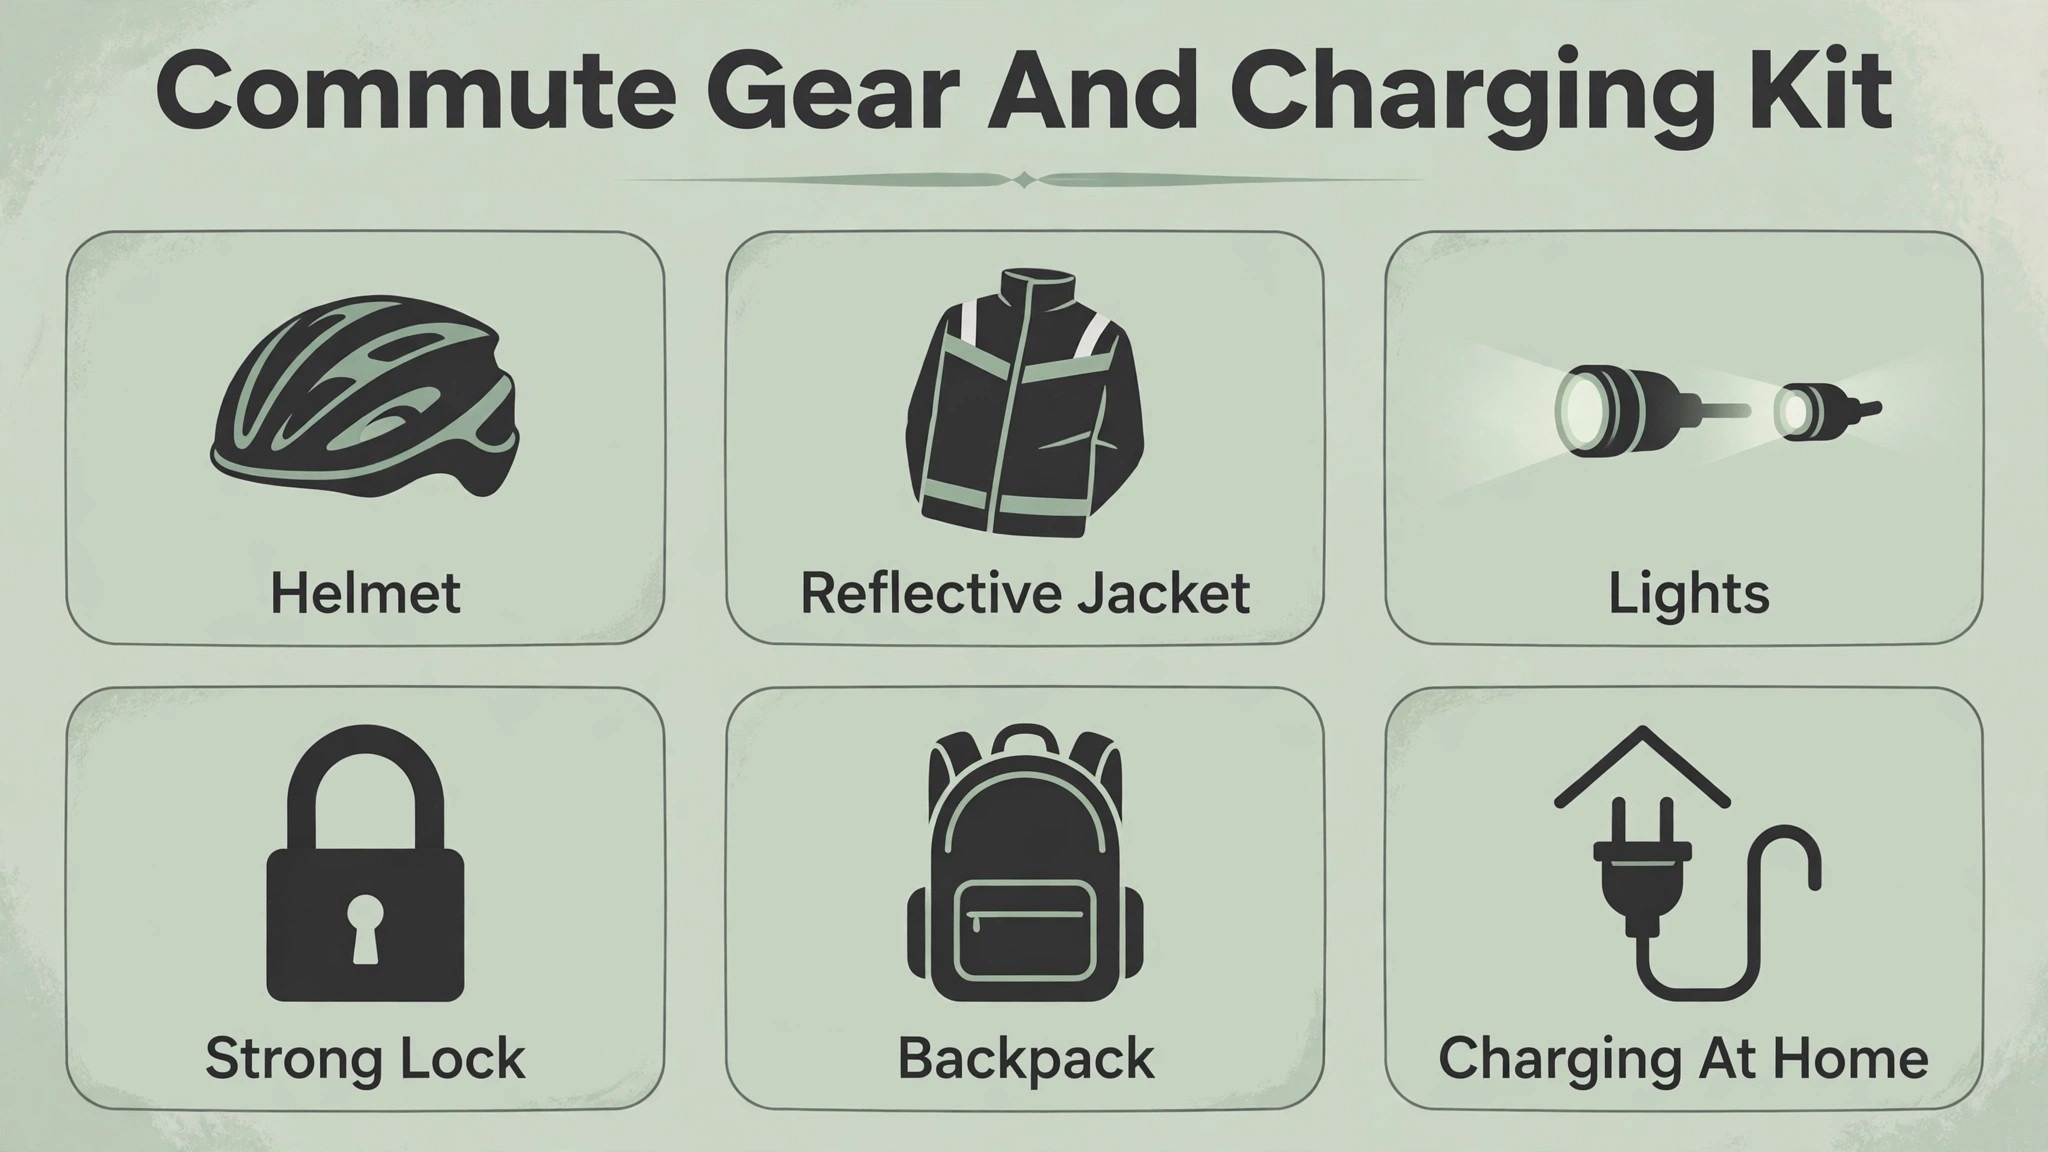
Commute Gear and Charging Table
Use this table to build a commute kit that covers safety, weather, security, and battery needs without overloading you with gear you will not use. A planned kit is a useful part of how you set up electric scooter for commuting beginners for daily use.
| Gear or charging item | Why it matters for commuting | Beginner tip |
|---|---|---|
| Certified helmet | Protects your head in a fall, which is the highest risk injury | Choose a snug fit, replace after any impact |
| Reflective jacket or vest | Makes you visible in low light and at junctions | Wear it even on cloudy mornings, not only at night |
| Front and rear lights | Lets drivers and pedestrians see you and your direction | Test lights before each ride, carry a spare battery or charge |
| Strong lock | Prevents opportunistic theft at work or shops | Lock through the frame and a fixed rack, not only a wheel |
| Backpack with straps | Carries work items without shifting your balance | Use chest and waist straps, avoid a shoulder bag that swings |
| Phone mount | Shows navigation without holding the phone | Mount where a glance is easy, never stare at the screen while moving |
| Tyre pump and repair kit | Fixes a slow puncture on a pneumatic tyre commute | Practise using the kit at home before you need it on a road |
| Charging at home overnight | Starts each day with a full battery | Charge on a hard surface, in a dry room, with the supplied charger |
| Charging at work top up | Extends range for a longer return trip | Ask permission first, use a safe outlet away from walkways |
| Storage charge for long breaks | Protects battery health during holidays | Store at a partial charge, roughly half full, in a cool dry place |
| Spare charger at work | Covers a forgotten home charge on a busy morning | Keep it labelled, so it does not get mixed with other chargers |
Charge with the supplied charger, on a hard surface, in a dry room, and avoid charging overnight unattended if your manual or building rules advise against it, because lithium batteries need respect even though fires are rare. Let the scooter cool for a short while after a hard ride before charging if the battery area feels warm, and keep the charging port clean and dry to avoid corrosion. Do not ride with a very low battery, because power and braking can feel weaker as charge drops, and a scooter that stops suddenly on a busy road creates a hazard for you and for traffic behind you.
Plan a battery reserve of at least a fifth of the range for detours, headwinds, and hills, because a commute that uses the full quoted range on a calm day will fall short on a windy or hilly day. Keep a note of your real range over a week of commutes, because real range, not quoted range, is the number that should decide whether a top up at work is needed.
Ride Defensively in Traffic, Around Pedestrians, and at Junctions
Defensive riding means assuming other road users may not see you, even when you have the right of way. Keep a safe distance from parked cars, because a door can open suddenly into a bike lane, and ride far enough from the kerb to avoid drains and debris without moving into fast traffic. Make eye contact with drivers at junctions where you can, signal turns with a clear hand signal when it is safe to take a hand off the handlebar, and slow down at every junction, even a familiar one, because a familiar junction is where complacency causes mistakes.
Around pedestrians, slow down, use your bell early and politely, and give a wide berth, because pedestrians may step sideways without looking, especially near shops, schools, and bus stops. Avoid riding on pavements where local rules forbid it, and where shared paths allow scooters, keep speed low and yield to walkers. Avoid riding one handed with a coffee or a phone, because a pothole or a sudden stop needs both hands on the handlebar. In rain, slow down, brake earlier, avoid painted road markings and metal covers that become slippery, and wear a waterproof layer that does not flap into the wheels.
Defensive riding feels slow at first, but it is the habit that lets you commute daily without incident, which is faster in the long run than any single fast trip. Defensive habits matter when you set up electric scooter for commuting beginners for busy roads.
Maintenance, Tyres, Brakes, and Storage for Daily Use
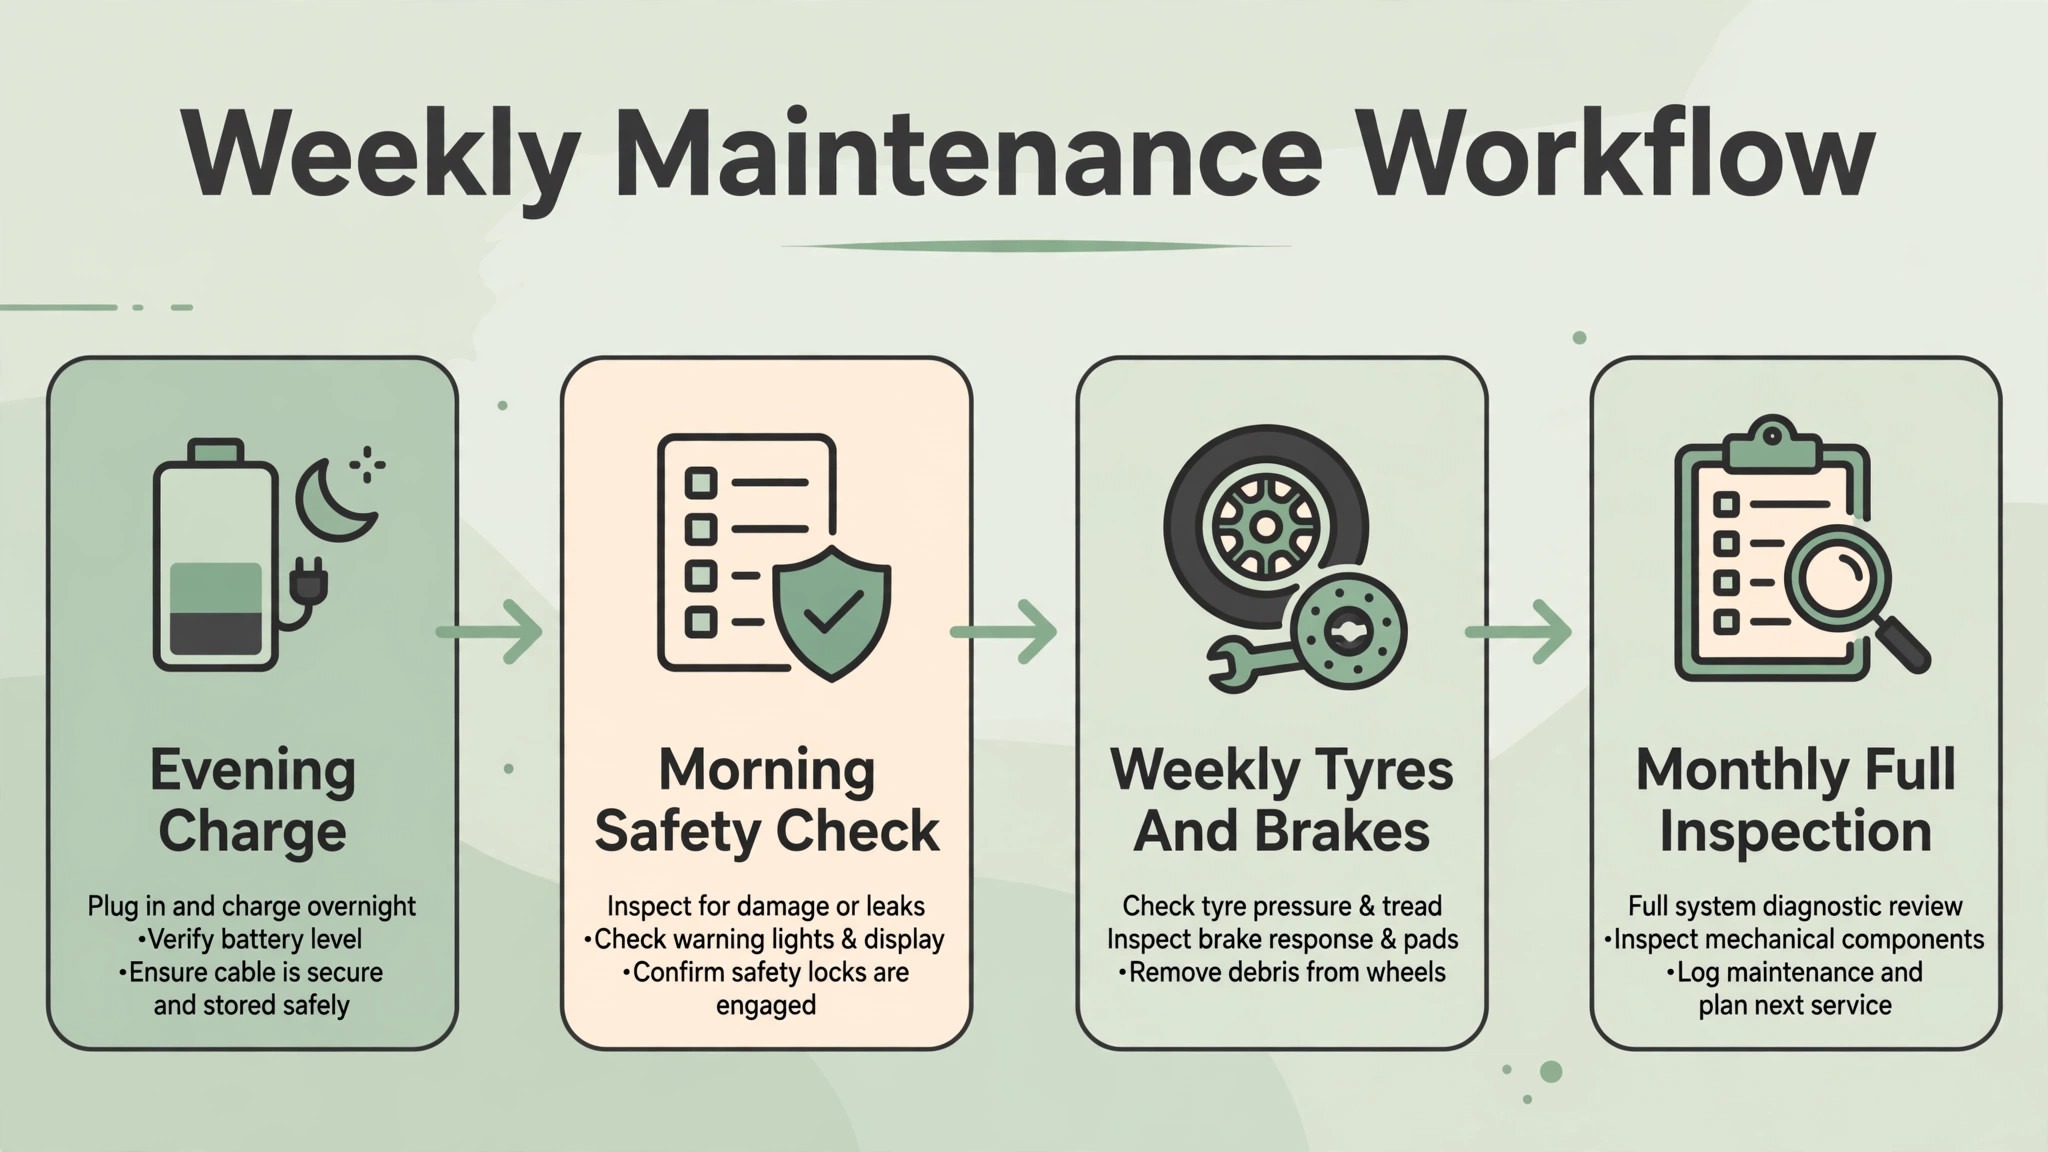
Daily commuting wears a scooter faster than occasional weekend riding, so a short weekly maintenance check pays for itself. Check tyre pressure weekly for pneumatic tyres, inspect tyres for cuts, check brake function, check folding latch tightness, and wipe the scooter clean, especially after rain or dusty roads. Check bolts and handlebar tightness monthly, and listen for new rattles, squeaks, or wobbles, because a new noise often signals a loose part before it becomes a failure. Keep the scooter clean and dry, store it indoors where possible, and avoid leaving it in rain or extreme heat for long periods, because weather accelerates wear on bearings, brakes, and electronics.
Lubricate moving parts only as your manual advises, and avoid spraying lubricant on brake surfaces, because contaminated brakes lose stopping power. Keep a service record with dates for tyre changes, brake pad changes, and any repair, because a record helps a service centre diagnose a problem and helps you judge when a part is due for replacement. If a fault affects brakes, steering, or battery safety, stop riding and seek professional repair rather than improvising a fix, because those systems protect you in every ride.
Choosing a Commuter Scooter for Your Route and Body
Choose a scooter by route distance, hills, rider weight, storage, and local rules, not by top speed alone. Choosing by route fit is a key step when you set up electric scooter for commuting beginners. Check the maker weight limit, because a scooter ridden near or over its limit will have reduced range, slower acceleration, and faster brake wear. Check real range for your weight and hills, using owner reports for similar riders rather than only the quoted maximum, which usually assumes a light rider on flat ground at low speed. Check wheel size, because larger wheels handle potholes and rough roads better, while smaller wheels fold smaller and carry more easily.
Check suspension if your route has rough surfaces, because suspension reduces fatigue and improves control on cracked roads, at the cost of extra weight and maintenance. Check water resistance rating for your climate, because a scooter that will face rain needs better sealing than a scooter used only on dry days. Test ride if possible, checking comfort, braking, folding, and weight in your hands, because a scooter that feels awkward in a shop will feel worse after a week of commuting. Buy from a seller who can supply parts and service, and keep the manual and warranty information where you can find them after a fault.
How to Set Up Electric Scooter for Commuting Beginners as a Daily Habit
A daily habit turns a new scooter from a novelty into a reliable commute. Each evening, plug in the charger, check tomorrow weather and route, and confirm the helmet, lock, and lights are ready by the door, so the morning starts without a search. Each morning, run the short safety checklist, check battery level, and leave with enough time to ride the safe route rather than the fastest route. Each week, check tyres, brakes, and folding latch, clean the scooter, and review any close call or difficult junction, asking whether a route change or a slower approach would help.
Each month, check for firmware updates, inspect brake pads and tyres closely, and review your real range against your commute distance, adjusting charging plans if range has dropped. People who set up electric scooter for commuting beginners as a habit, rather than as a single purchase, tend to keep riding through weather changes and busy weeks, because their routine removes daily decisions and leaves only the ride itself. That routine, plus defensive riding and regular maintenance, is what makes scooter commuting safe, enjoyable, and genuinely useful day after day.
Frequently Asked Questions
Do I need a helmet to ride an electric scooter to work?
Helmet rules vary by location and sometimes by age, so check your local rules before your first commute. Even where a helmet is not legally required, wearing a certified helmet is strongly advised, because head injuries are among the most serious scooter injuries and a helmet is inexpensive protection. Choose a helmet that fits snugly, fasten the strap every time, and replace it after any impact, even if no damage is visible.
How far can a beginner electric scooter go on one charge?
Real range depends on rider weight, hills, wind, speed, tyre pressure, and temperature, so quoted maximum range usually overstates a real commute. As a planning guide, expect real range to be noticeably less than the quoted maximum, and keep a reserve for detours and headwinds. Track your own range over a week of commutes, and plan a top up at work if your return trip would otherwise use most of the battery.
Can I ride an electric scooter on pavements or bike lanes?
It depends on local rules, and the answer differs by city and country. Many places allow scooters in bike lanes and on roads but ban them from pavements, while others allow shared paths where scooters must yield to pedestrians. Check official local guidance for your area, ride only where scooters are allowed, and slow down around pedestrians on any shared path. When rules are unclear, choose a bike lane or quiet road over a pavement.
How do I charge an electric scooter battery safely?
Use the supplied charger, charge on a hard surface in a dry room, keep the charging port clean and dry, and follow your manual on unattended or overnight charging. Let the scooter cool briefly after a hard ride before charging if the battery feels warm, and store the scooter at a partial charge during long breaks. If a battery swells, smells unusual, or heats up during normal charging, stop using it and seek advice from the maker.
What should I do if I get a puncture on the way to work?
Stop safely away from traffic, assess whether a temporary repair kit can seal the puncture, and walk or use public transport if the tyre cannot be fixed safely. Practise using a repair kit at home before you need it, because a roadside repair under time pressure is harder than a calm practice run. Carry a small pump and repair kit for pneumatic tyres, and consider solid tyres or a sealant product if punctures are frequent on your route, weighing the harsher ride against fewer roadside stops.
Is an electric scooter cheaper than a bus pass for commuting?
It can be, over time, if your commute distance suits a scooter and you ride most workdays, because the main costs are the scooter, a helmet, a lock, and occasional tyres and brake pads, plus a small amount of electricity. Compare the scooter total cost over two years, including maintenance and any replacement parts, with two years of bus fares for your route, and include the value of time saved and flexibility gained. If you ride only occasionally, a bus pass or pay as you go fares may still be cheaper, so base the decision on your real riding frequency.
A Calm Start to Scooter Commuting
Start slow, practise in a car park, choose the safe route over the fast route, and build a daily checklist that becomes automatic. That patient start is the best way to set up electric scooter for commuting beginners and keep riding safely. A helmet, working brakes, charged battery, and defensive riding will carry you through your first month better than any high speed or long range figure. Review your route and your range after a week, adjust one thing at a time, and keep maintenance simple and regular. That patient start turns a new scooter into a commute you actually enjoy, day after day, in real traffic and real weather.
More Reading on Stratilyze
Readers who enjoyed this scooter guide often continue with the drone setup guide for beginners, the GoPro setup guide for beginners, and the security camera guide for apartment renters, because those guides share the same safety first approach of a checklist, a practice routine, and simple habits that work in the real world rather than only in a review.