
The problem with camping power is not a lack of gadgets. It is arriving at a campsite with a dead phone, a camera battery at ten percent, and a portable fridge warming up, while a power station you bought for exactly this trip sits unused because nobody worked out what plugs into where, or how long anything would actually run. Power at a campsite fails from planning, not from technology, and a power station used without a budget is just a heavy box. This guide explains how to set up portable power station for camping properly, starting with a power budget, then charging, then the campsite routine that keeps everything running for the whole trip.
A portable power station is a rechargeable battery with built in outlets, meaning AC household sockets, USB ports, and often a 12 volt car style socket, plus an inverter that turns battery power into mains style power for larger devices. Unlike a small power bank, it can run a fridge, charge a laptop, and power lights for days, depending on its size. Unlike a petrol generator, it runs silently, produces no fumes, and can be used inside a tent vestibule or a camper, though ventilation and weather protection still matter. The key numbers are capacity in watt hours, which decides how long things run, and output in watts, which decides what things it can run at all.
Choose the Right Size Before the Trip
Capacity and output are different, and confusing them is the most common buying mistake. Capacity, measured in watt hours, is the size of the fuel tank, meaning how much energy the station holds. Output, measured in watts, is the size of the engine, meaning how much power it can deliver at once. A station with large capacity but low output runs small devices for a long time but cannot start a high watt appliance, while a station with high output but small capacity runs a large appliance briefly and then empties. For camping, capacity usually matters more than peak output, since phones, lights, cameras, and small fridges are low watt devices used over days.
Work out your daily energy need before buying or packing, using the simple formula of device watts multiplied by hours used, which gives watt hours per device, added across devices for a daily total. A phone charging at 10 watts for two hours needs 20 watt hours, a laptop at 60 watts for three hours needs 180 watt hours, and a small 12 volt fridge averaging 40 watts over a day needs 960 watt hours, though fridges cycle on and off, so real use is often lower than the label suggests.
Add the devices you actually carry, not the devices you might carry, and compare the daily total with station capacity, remembering that inverter losses mean usable energy is typically 80 to 90 percent of the labelled capacity, not the full number.
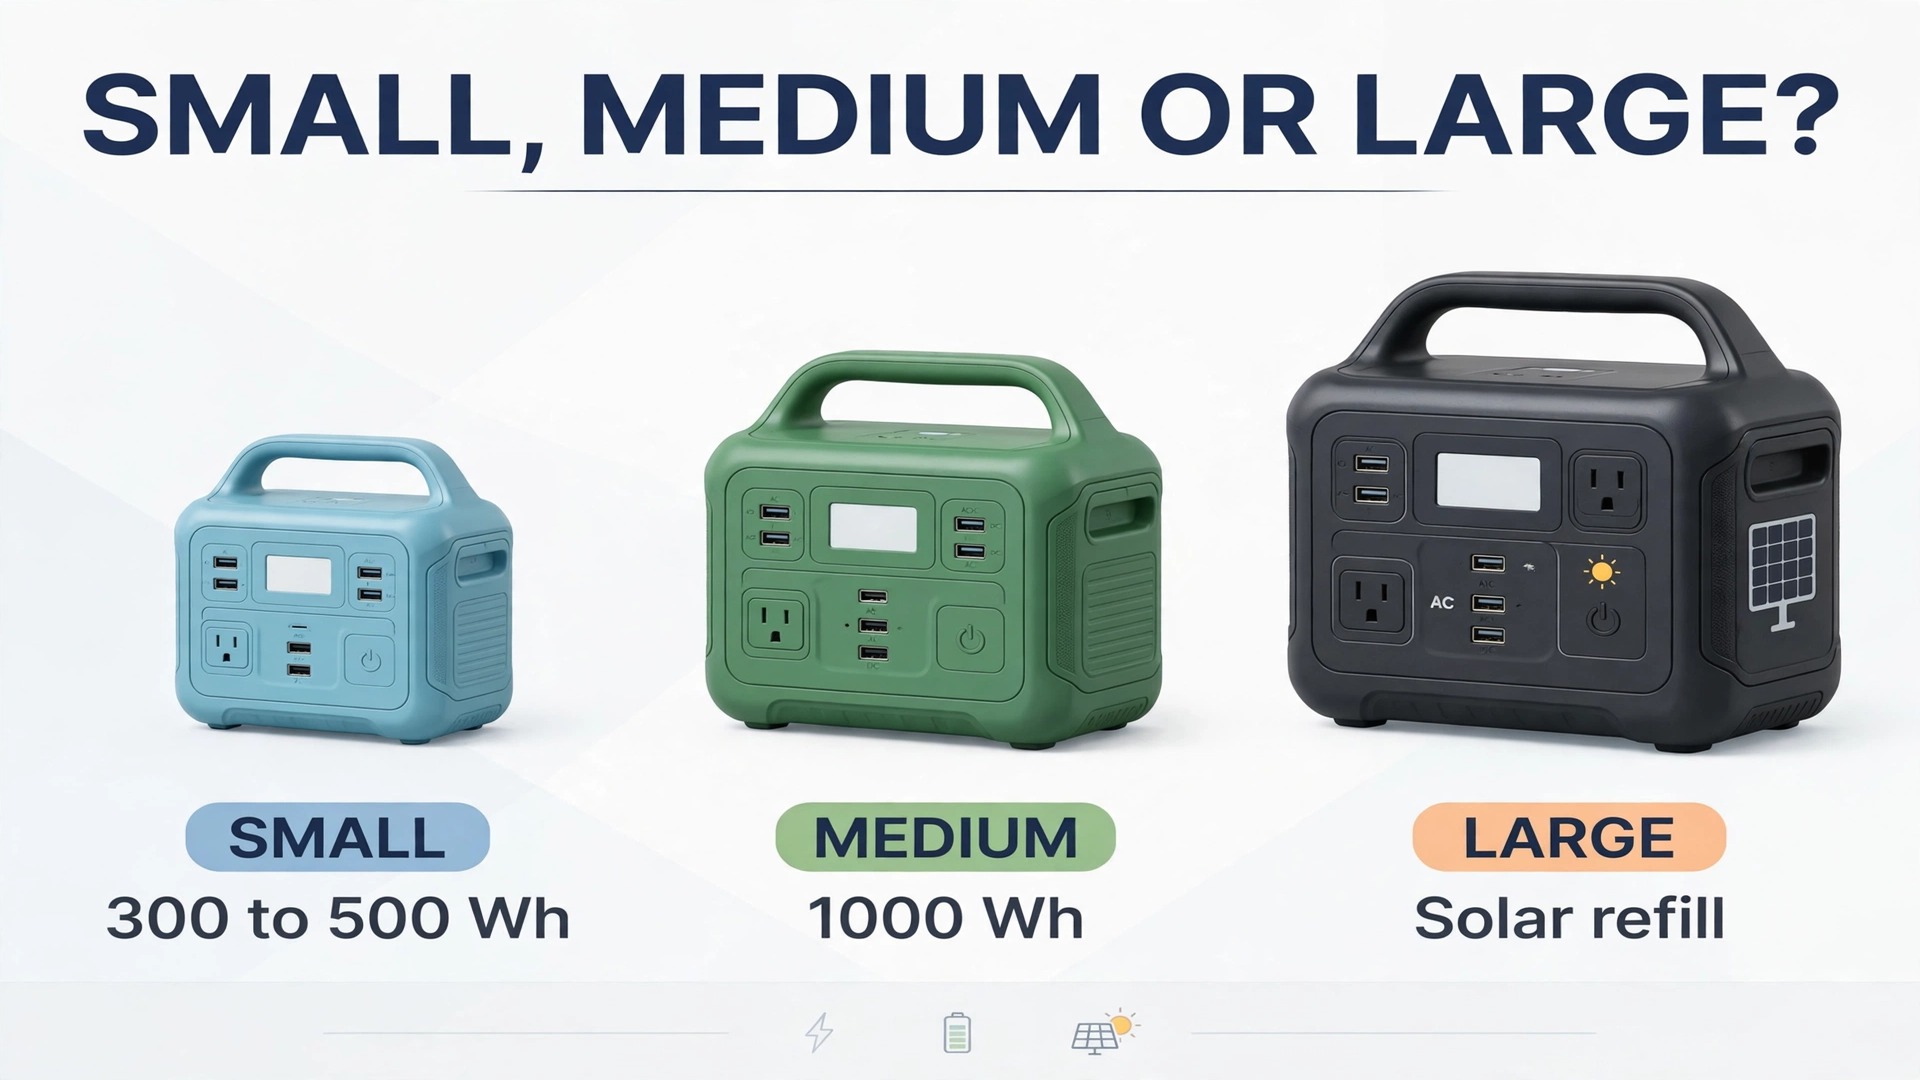
Size guidance follows from that maths. A weekend of phones, lights, and cameras for two people usually fits in 300 to 500 watt hours, a weekend with a laptop and a small fridge usually needs 1000 watt hours or more, and a week off grid with a fridge needs either a much larger station or solar panels to refill daily. Weight rises with capacity, and a 1000 watt hour station often weighs over 20 pounds, which matters if you carry gear far from the car. Car camping suits larger stations, while hike in camping suits a small station plus a power bank, since carrying a heavy station on a trail defeats the purpose of travelling light.
Battery chemistry matters for lifespan and safety, though beginners need only the headline distinction. Lithium iron phosphate, often written LiFePO4 or LFP, lasts for thousands of charge cycles and handles heat better, making it the preferred chemistry for a station bought for years of camping. Older lithium ion stations are lighter for the same capacity but age faster with regular use. If two stations cost similarly and one uses LFP, the LFP station usually wins for a buyer who camps often, while a casual camper who goes twice a year may reasonably choose on price and weight instead.
How to set up portable power station for camping
The setup sequence below assumes the station is new or freshly charged at home, and it covers the home preparation that makes campsite use smooth, since most camping power failures trace back to home preparation skipped in a rush. Do the budget, charging, and test run at home, not at the campsite, where shops and chargers are far away. To set up portable power station for camping well, the home test run is the step that prevents a campsite surprise, because a station that works at home will work at camp, while a station never tested at home is an unknown.
- Charge the station fully at home. Plug it into a wall outlet with its supplied charger, wait for a full charge, and note how long the charge took, since that time tells you how long a campsite recharge from a car or solar panel might take. A station that arrives partly charged should still be fully charged before a trip, since a partial charge on departure wastes a quarter of your energy before you leave.
- Update firmware if the maker app offers it. Some stations update through a phone app over Bluetooth or Wi-Fi, improving charging behaviour and display accuracy. Update at home on stable Wi-Fi, not at camp, since an update interrupted by a weak signal can leave the station in an odd state until it completes.
- Build your power budget on paper. List every device, its watts from its label or charger, and hours per day, multiply to watt hours, and total the day. Compare the total with usable capacity, meaning about 85 percent of labelled capacity, and decide what runs daily, what runs on alternate days, and what stays home if the maths does not fit. A budget on paper beats a budget in your head, because paper shows the fridge problem before the fridge warms up.
- Test run the full kit at home. Plug in the fridge, charge the phone and laptop, run the lights, and watch the station display for output watts and remaining time, confirming the budget matches reality. A test run reveals a fridge that draws more than its label, a laptop charger that needs a higher watt USB port, or a cable that does not fit, all fixable at home and all annoying at camp.
- Pack cables, adapters, and solar panels as a kit. Pack the station charger, device cables, a multi tip cable for cameras, and solar panel cables in one bag, labelled if possible, so campsite setup does not involve hunting through three bags for one cable. A cable left at home is the most common reason a working station cannot charge a needed device, and a kit bag prevents it.
- Plan the campsite layout before arrival. Decide where the station will sit, meaning dry, shaded, ventilated, and near the tent but not inside a sleeping area, where solar panels will face sun if used, and where devices will charge overnight without blocking tent entrances. A layout decided at home takes minutes to execute at camp, while a layout improvised on arrival usually puts the station in the wrong place and the solar panel in shade.
- Run a first night check at camp. On arrival, set up the station, plug in the fridge first, then lights, then phones, and check the display after an hour, confirming output matches the budget and remaining capacity matches expectations. A first night check catches a fridge door left ajar, a light left on high, or a device charging far longer than planned, while there is still time to adjust before the trip energy runs short.
Once the first night check passes, daily use becomes routine, with morning solar setup, daytime charging, and evening light use following the pattern in the next sections. A station that survives its first night on budget will usually survive the whole trip, since the first night contains most of the unknowns, from fridge cycling to real device use. To set up portable power station for camping in full, home preparation plus a first night check beats any amount of campsite improvisation, and that combination is what experienced campers actually do.

Power Budget Table by Device
The table below is the overview proof element for this guide in budget form, paired with the solar and charging workflow in the next section, and it gives typical figures to start your own budget, since exact watts vary by device and you should confirm yours from labels. Use these figures as estimates, then replace them with your own device numbers for a budget you can trust.
| Device | Typical watts while running | Hours per day | Watt hours per day |
|---|---|---|---|
| Phone charging | 10 watts | 2 hours | 20 watt hours |
| Headlamp or camp light | 5 watts | 4 hours | 20 watt hours |
| Laptop charging | 60 watts | 3 hours | 180 watt hours |
| Camera battery charging | 10 watts | 1 hour | 10 watt hours |
| Small 12 volt fridge, averaged | 40 watts | 24 hours cycling | 400 to 600 watt hours |
| Portable fan | 15 watts | 6 hours | 90 watt hours |
| Bluetooth speaker charging | 10 watts | 1 hour | 10 watt hours |
| CPAP machine, without humidifier | 40 watts | 8 hours | 320 watt hours |
| Electric kettle, short use | 1000 watts | 0.2 hours | 200 watt hours |
| String lights, LED | 10 watts | 4 hours | 40 watt hours |
Reading the table shows why fridges and medical devices dominate a camping budget, while phones and lights barely register. A trip budget that ignores the fridge will fail, since the fridge alone can exceed the total of every other device combined, and a trip budget that fears phone charging will overbuy, since phones are cheap in energy terms. The kettle row shows the opposite trap, which is a high watt device used briefly, since a kettle needs a station with enough output watts to start it at all, even though its daily energy is modest, and a station that cannot reach 1000 watts output cannot run that kettle even for a minute.
Prioritise devices when the budget is tight, using a simple ranking. Medical devices first, since a CPAP or refrigerated medicine cannot wait, then food safety, meaning the fridge, then communication, meaning phones, then work, meaning laptops, then comfort, meaning lights and fans, then luxury, meaning speakers and kettles. A ranking decided at home prevents campsite arguments about what gets charged first, and it lets the group agree that a speaker waits while a phone charges, without debating it in the dark. Share the ranking with the whole group before departure, since a budget only one person understands is a budget nobody follows.

Solar and Charging Workflow
Charging a power station at camp follows a daily workflow, not a single plug in moment, and the workflow below covers wall, car, and solar charging in the order to use them. At home before departure, wall charging is fastest and should bring the station to full. On the drive to camp, car charging through a 12 volt socket tops up slowly, typically at 100 watts or less, which adds useful energy over a long drive but cannot refill a large station quickly. At camp, solar charging refills daily, weather permitting, and its output depends on panel watts, sun angle, shade, and temperature, in that order of importance.
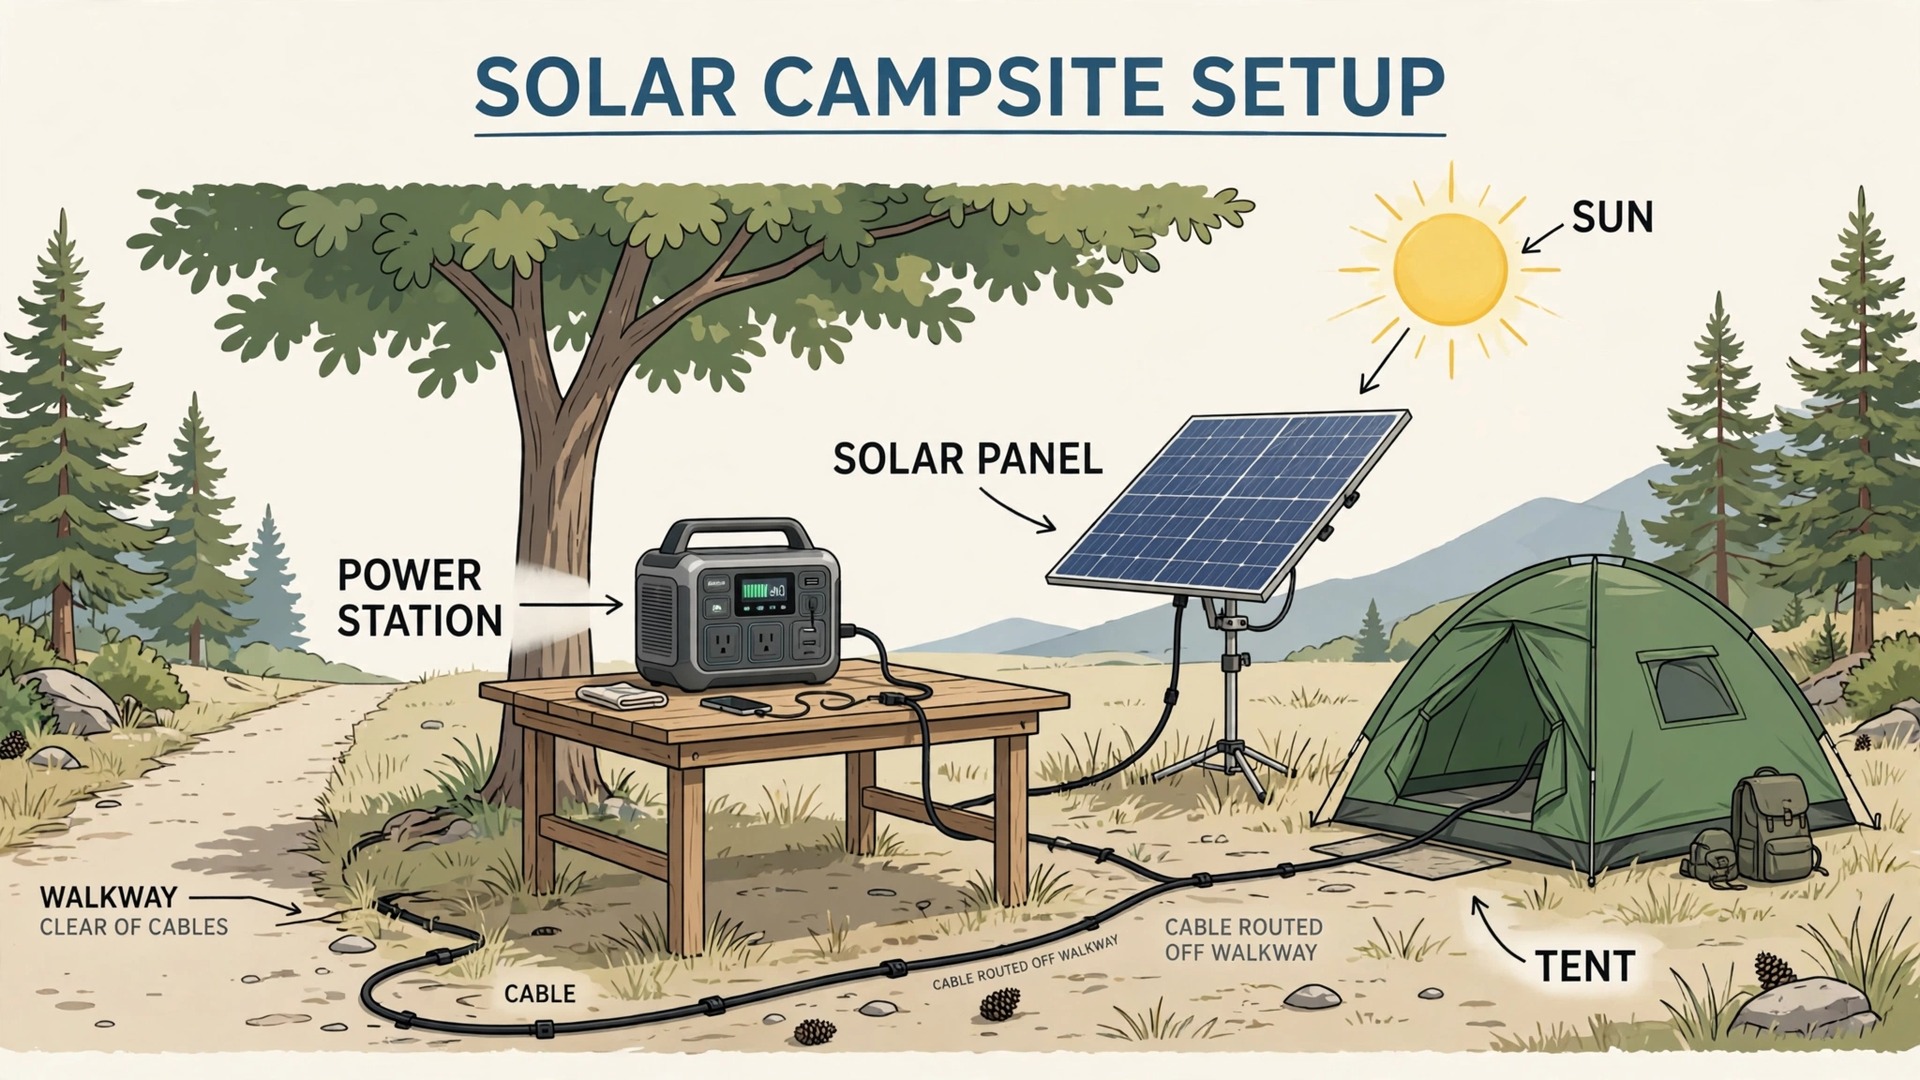
Solar panel setup deserves care, since a panel in partial shade produces far less than its label, and a panel laid flat at noon in summer still underperforms a panel angled toward the sun. Place panels in full sun, angled toward the sun, and move them once or twice during the day to follow the sun if you are at camp, since a panel that follows the sun can produce a third more energy than a panel left flat. Keep panels clean, since dust and leaves cut output, and keep cables out of walkways, since a tripped cable disconnects charging and creates a fall hazard in a busy camp.
Expect realistic solar numbers, not label numbers. A 100 watt panel in good sun typically delivers 60 to 80 watts in practice, and over five good sun hours produces 300 to 400 watt hours, which covers phones, lights, and cameras, but not a fridge alone. A 200 watt panel setup doubles that, covering a small fridge on a sunny day, while cloudy days can halve output or worse, so a solar plan needs a weather buffer, meaning a station large enough for one cloudy day without solar, or a car charging backup. Plan for the cloudy day, enjoy the sunny day, and the trip energy stays calm in both.
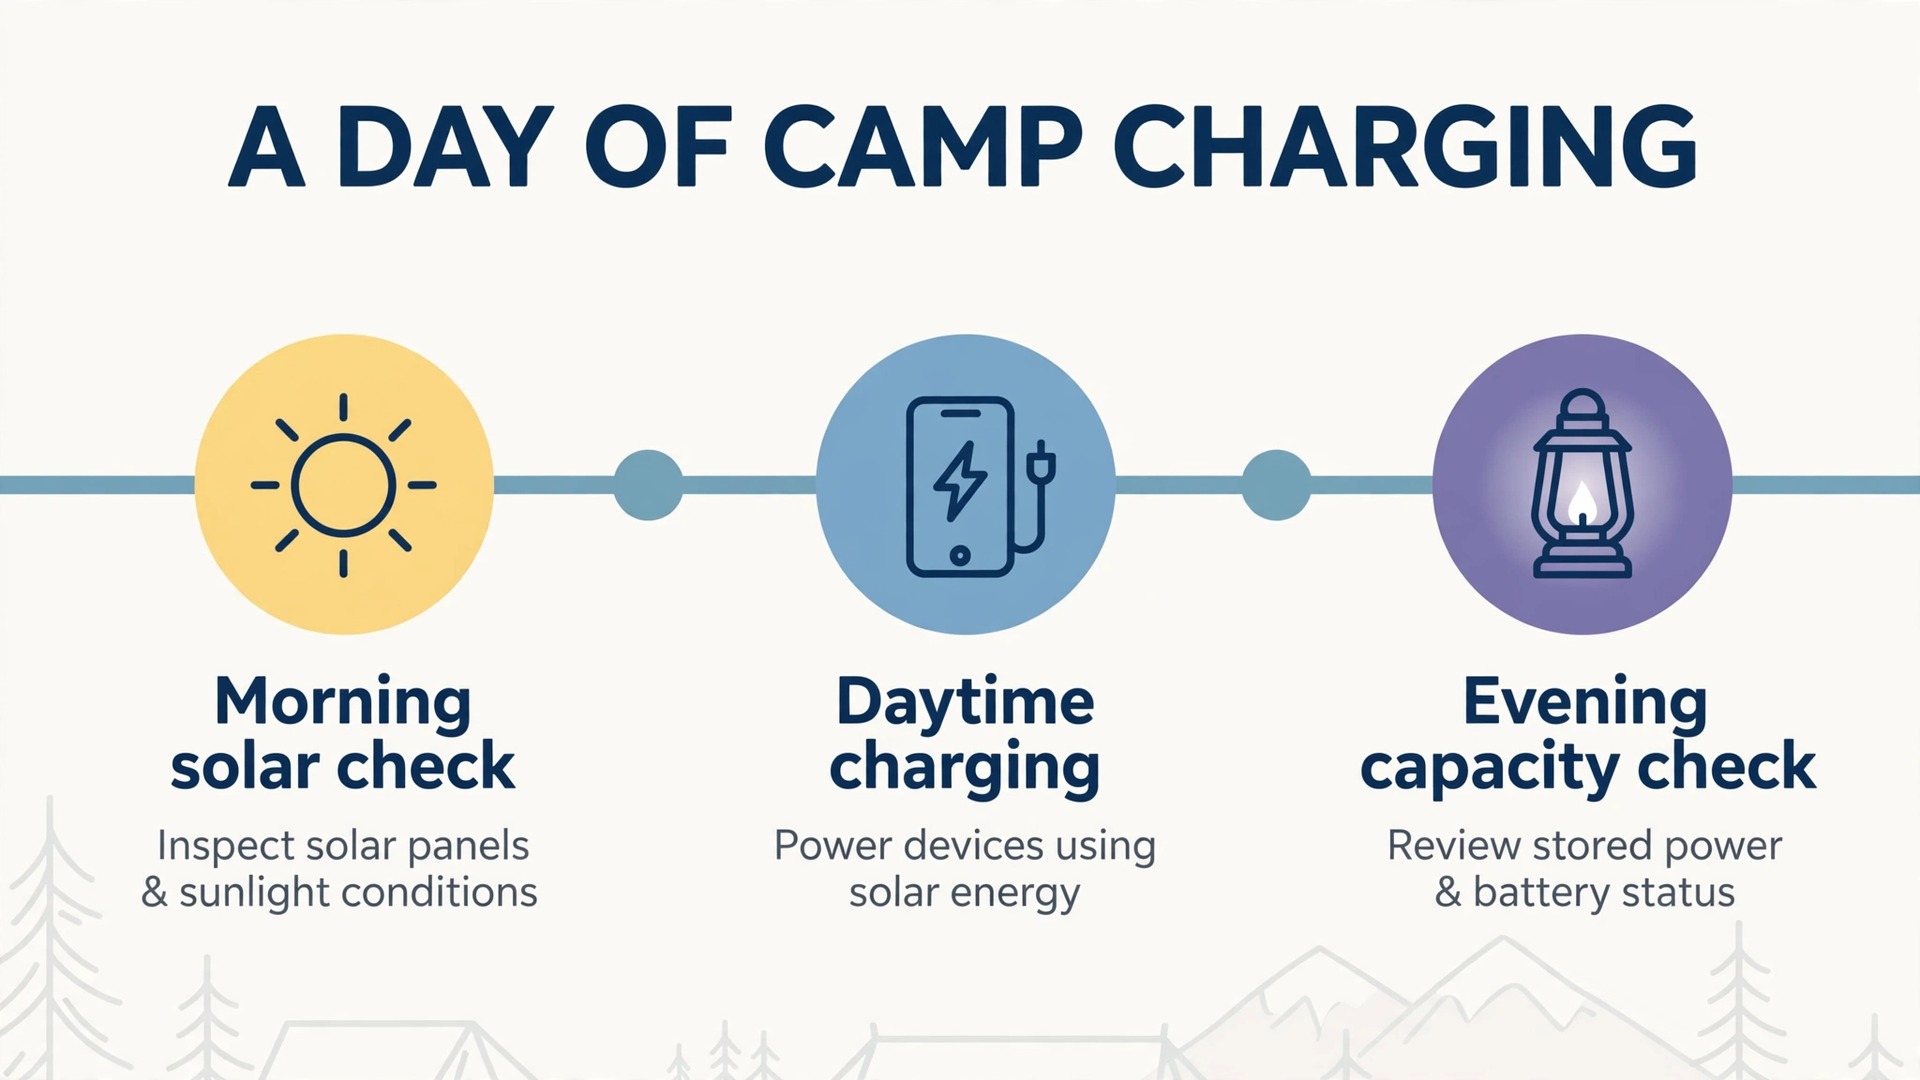
The daily workflow looks like this in practice. Morning, place solar panels in sun and confirm the station display shows solar input watts, since a display showing zero means a cable, shade, or panel angle problem to fix now, not at dusk. Daytime, charge phones and cameras from the station while solar refills it, prioritising devices by the ranking from the budget section. Evening, run lights and fridge from stored energy, check remaining capacity before bed, and decide whether tomorrow needs stricter use, such as fewer lights or no kettle, based on that number. A morning input check plus an evening capacity check takes two minutes and prevents the surprise of a station empty at breakfast.
Campsite Safety, Weather and Storage
Safety rules for power stations are straightforward, and they matter more at camp than at home because weather, water, and tents combine. Keep the station dry, since rain on outlets and vents can damage electronics and create shock risk, and use a dry bag, a covered table, or a tent vestibule with ventilation for wet weather, never a sealed plastic bag that traps heat. Keep the station ventilated, since charging and high output generate heat, and a station buried under bedding or clothing overheats.
Keep the station away from open flames and hot stoves, since battery damage from heat is a serious risk, and keep it out of direct sun on hot days where possible, since sun plus charging heat together age the battery faster.
Water and electricity need a clear boundary at camp. Do not handle station outlets with wet hands, do not run cables through puddles or across wet ground where people walk, and do not charge devices in the rain without cover, since wet connections corrode and can short. If the station gets wet, switch it off, disconnect devices, dry it thoroughly, and do not use it until it is fully dry and the display looks normal, since a wet station used too soon can fail in ways that are hard to reverse. A station that smells, swells, or shows damage should be taken out of use and checked by the maker, not coaxed back to life at camp.
Storage between trips matters as much as camp use. Store the station at room temperature, partly charged rather than empty or full, typically around half to 80 percent for long storage, and recharge it every few months if unused, since batteries self discharge slowly and a battery left empty for a year may not recover fully. Store cables and panels clean and dry, check the station display every few months, and run a short test before the first trip of the season, since a station that sat all winter deserves a test run at home before it carries a trip.
These storage habits cost minutes and extend the station life by years, and they are worth building into how you set up portable power station for camping each season, since a station checked in spring is a station trusted in summer.
When you set up portable power station for camping with safety included, the campsite routine becomes automatic. Dry, shaded, ventilated placement, morning solar check, evening capacity check, and a clear device ranking, repeated daily, keep energy calm across the trip, and the station becomes a quiet background helper rather than a daily worry.

What Not to Run and When to Leave It Home
Some devices suit a power station poorly, and knowing them saves disappointment. High watt heating appliances, such as electric kettles, induction hobs, and hair dryers, need high output stations and drain capacity quickly, so they suit large stations on short trips but not small stations on long trips. Power tools, air compressors, and large coolers with compressors that surge on startup need output headroom above their label watts, since startup surge can be double the running watts, and a station that trips on surge protects itself but leaves the device unpowered.
Check both running watts and surge watts before planning such devices, and test them at home, since a home test reveals a surge trip before a campsite needs the device urgently.
Weight and transport decide whether a station should come at all. A station that is too heavy to carry from car to tent comfortably will be left in the car, where it is less useful and more vulnerable to heat, so choose a station you can actually carry on the terrain you camp on. Wheels and handles help on flat campgrounds but not on rough trails, and a station carried by two people still needs a safe lifting technique, since a dropped station can damage the battery and the carrier alike.
If the station cannot be carried safely to the tent, a smaller station plus power banks is the better kit, even if the maths favours the larger station on paper.
Group camping changes power maths, because one station suddenly serves four phones, two cameras, a speaker, and a fridge, while only one person understands the budget. Shared power needs shared rules, agreed before departure, or the station empties by Saturday morning and nobody knows which device caused it. Start by naming a power keeper for the trip, meaning one person who checks the display morning and evening and announces remaining capacity, since a station with no keeper gets used as if it were infinite, and infinite is the one capacity no station has.
Agree a charging rota for the group, with phones charged in batches rather than all at once, and with a rule that no device charges overnight unless it is a medical device or a phone needed for morning navigation. A rota sounds formal, but in practice it means a simple list on a tent wall or a group chat message, stating which phones charge after dinner and which charge after breakfast, so everyone gets a turn without overloading the station at once.
Multiple devices charging simultaneously also draw more watts than the station output may allow, so a rota protects the station as well as the schedule, and it prevents the mid charge shutdown that happens when too many high watt chargers run together.
Shared solar panels need a placement agreement too, since panels moved by one camper into shade affect everyone, and panels left in a walkway get tripped over by the next camper. Mark the solar area with a small boundary, such as a groundsheet edge or a line of camp chairs, and agree that panels move only by the power keeper or by announcement to the group. That small discipline keeps solar input steady across the day, which matters more than panel size on a group trip, since a large panel in shade produces less than a small panel in sun.
When you set up portable power station for camping with a group, these shared rules matter as much as the budget itself, because a budget followed by one person and ignored by five is not a budget at all.
Finally, plan a group backup, meaning a car charging top up on a driving day, a second small power bank for phones, or a nearby campsite power point if the site offers one. A backup does not need to cover the whole trip, it only needs to cover the gap between a cloudy day and a sunny day, or between a fridge fault and a shop visit, and that gap is where group trips usually fail. A group that arrives with a budget, a rota, a keeper, and a backup enjoys power as a background comfort, while a group that arrives with only a station enjoys power as a daily argument, and the difference is entirely preparation.
More Reading on Stratilyze
More Reading on Stratilyze. Outdoor gear setup continues beyond power, so the guides on Bluetooth speakers for outdoor movies and home Wi-Fi mesh networks for a small house cover related outdoor and home power topics, and the guide on best smart home devices for 2026 covers home energy more widely. Read the outdoor speaker guide first if movie nights are part of your camp plan, since speaker power needs belong in the same budget as lights and phones.
Frequently Asked Questions
How long will a 1000 watt hour station run a small camping fridge?
It depends on the fridge, the weather, and how often the door opens, but a small 12 volt fridge averaging 40 watts uses roughly 400 to 600 watt hours per day after cycling, so a 1000 watt hour station, with usable energy around 850 watt hours, typically runs it for about a day and a half without recharging. Solar panels, cooler ambient temperatures, and keeping the fridge full and shaded extend that time, while hot weather and frequent door opening shorten it. Test your fridge at home for a day to get your real number.
Can I charge a power station from my car while driving?
Yes, most stations charge from a car 12 volt socket, typically at around 100 watts, which adds useful energy over a long drive but refills a large station slowly. A two hour drive adds roughly 200 watt hours, enough for phones and lights, but not enough to refill a station emptied by a fridge. For faster car charging, some makers sell a dedicated alternator charger that charges far faster, though it needs installation and costs more, so check maker options before a long road trip.
How many solar panels do I need for camping?
It depends on daily use and sun, but a useful rule is that a 100 watt panel in good sun produces roughly 300 to 400 watt hours per day, covering phones, lights, and cameras, while a 200 watt setup covers a small fridge on a sunny day. Start from your power budget, divide daily watt hours by 300 to estimate 100 watt panels needed, and add one panel or a weather buffer for cloudy days. Panels in shade produce far less, so panel placement matters as much as panel count.
Is it safe to leave a power station charging overnight in a tent?
It is safer to charge devices overnight from a station placed in a ventilated vestibule or covered outdoor spot, rather than inside a sleeping area, and to keep the station dry, ventilated, and away from bedding. Charging itself is generally safe with a quality station, but a station that overheats, smells, or shows damage should be switched off and moved outside the tent. Never cover a charging station with bedding or clothing, since trapped heat is the main overnight risk.
What size power station do I need for a weekend camping trip?
For phones, lights, and cameras for two people, 300 to 500 watt hours usually suffices for a weekend, while adding a laptop pushes the need toward 500 to 800 watt hours, and adding a small fridge pushes it toward 1000 watt hours or more, or solar refilling. Build your budget from your actual devices, using watts multiplied by hours, and compare with usable capacity at about 85 percent of labelled capacity, rather than guessing from trip length alone.
Can a portable power station run a CPAP machine while camping?
Yes, many campers run CPAP machines from power stations, typically without the heated humidifier to save energy, since a CPAP without humidifier uses roughly 40 watts over eight hours, or about 320 watt hours per night. Check your machine label for its exact draw, test it at home for a full night on the station, and carry enough capacity or solar for each night of the trip, with a margin for cloudy days. Medical use deserves a home test, not a campsite experiment, since a failed night affects health, not just comfort.
Power Planned Is Power Enjoyed
Camping power rewards the camper who plans on paper, tests at home, and checks twice a day at camp, and it punishes the camper who buys the largest station and assumes the maths will work itself out. A budget, a kit bag, a solar workflow, and a device ranking turn a heavy battery into a reliable camp companion, and the trip that follows feels easier, because phones stay charged, food stays cold, and lights stay on, without daily energy anxiety.
Pack the station charged, run the home test, and do the first night check at camp, even when the trip feels routine. Those three habits catch the faults that ruin trips, and they take less time than a single emergency drive to a shop for a forgotten cable. To set up portable power station for camping and keep it working trip after trip, the rule is simple. Budget honestly, charge fully, place wisely, and check morning and evening, and the station will do the rest, quietly, for the whole trip.
